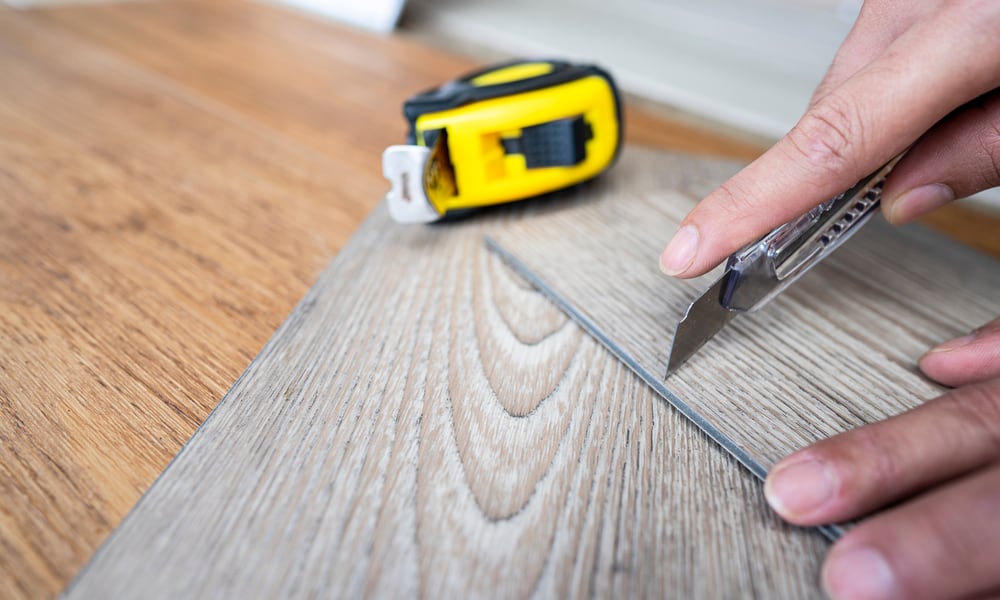
If there is an easy material to cut, it is vinyl, and here we will teach you how to cut vinyl floors. All you will need is a utility knife. Also, a rule. These cuts are generally made by marking the material. Then draw the line with the ruler. Next, pass the knife along the drawn line. Finally, fold the material and split it in two.
However, if you have difficult cuts that are circular cuts or strange shapes, you will certainly need to know the best way to mark the material. So the cut is perfect.
It contains the best tools. For all types of cuts. And who may know how to cut vinyl flooring? Like a professional.
What will you need to cut vinyl flooring?
You can use different tools for your cuts. Each of them will give you different results. The use of each depends on your taste. It also depends on your needs. Here you have the prices of the main tools.
- Tape measure: $9,800 – $11,800
- Pencil: $800 – $1,200
- Carpenter’s square: $24,900 – $26,900
- Contour Gauge: $34,000 – $65,000
- Vinyl Floor Cutter: $240,000 – $380,000
- Utility knife: $6,900 – $22,900
- Replacement blades: $2,900 – $5,000
- Aviation snips (optional): $17,500 – $32,000
- Electric jigsaw or compact circular saw: $80,000 – $600,000
Measuring and Cutting Tools for Cutting Vinyl Flooring
The tools needed to make the cuts. They are required for both measuring and cutting. The choice depends on your budget. In addition, to take into account their needs. For example, if you have several flooring projects in mind. You’ll want to invest in tools that last longer. However, you might be better off with the basic tools if it’s just for a project.
Basic tools
As basic tools, we have the tape measure and the utility knife. With these tools, you can make the length and half cuts. However, if you have curved cuts, you may require more specialized tools.
- Tape measure: It is the basic tool for measuring the pieces. However, a cloth ribbon could be used. The tape measure allows you to hold one end. This way, the tape does not run, and the measurement is more exact.
- Utility Knife: This is the most important tool when cutting vinyl flooring. Because vinyl flooring is a flexible material, the utility knife can easily cut through this material.
Specialized tools
Also, for cutting vinyl flooring, you can use other types of tools, particularly for notch cuts, for curved cuts. Among these tools are:
- Vinyl flooring cutter: Some cutters specialize in vinyl flooring due to its thickness and hardness. This tool allows for fine, straight cuts. And diagonal cuts. However, it is not the most suitable for a curved cut.
- Jigsaw: With this tool, you can make other types of cuts. Curved cuts. Also cuts them into strange shapes.
- Contour gauge: If you have curved cuts, it is best to have this tool. Because it allows you to copy the shape and transfer it to the part, there are contour gauges of different prices.
How to cut vinyl flooring in half?
These are the most common cuts because they are required to shorten the boards, mainly at the end of the rows. The cutting line is made perpendicularly, considering the table’s length.
Achieving a straight cut is the most important thing in this type of cut. Therefore, the use of a carpentry square is important. In this way, you will achieve the straightness you need.
To trace the cut, use the utility knife. In addition, it will be important that you purchase replacement blades. This way, you will always have sharp blades for your cuts.
Steps for cutting in half
Although it seems simple, there are important details that you need to be aware of. Follow these steps to achieve the desired cut:
Step 1: Measure the length of the cut
Measure the length you require to have the desired piece. Then mark the cut line. Use a fine-tip marker. The mark should be on the top layer of the floor.
Step 2: Locating Material for Cutting
Place the material on a flat surface. Preferably, do not cut it on the same floor. This is to avoid breaking or scratching the support material. It can be a scrap board or the material you don’t use. Never cut over the flooring you are installing.
Step 3: Draw the Cut Line
Then locate the square. The square edge should match the long side of the board. Draw the line through the mark you made. For this, use a fine tip. This ensures a proper cut. Be sure to hold the square to ensure a parallel line. In this case, use the carpentry square because 90° allows you to draw these lines perfectly.
Step 4: Make the Floor Cut
Before cutting, you’d better make sure of the measurement. It doesn’t hurt to check before cutting after checking the measurement. Instead, run the utility knife over the mark. Use a medium force. That is, neither very strong nor very soft.
Step 5: Separate the pieces
Finally, pick up the board and fold it back. This step is done by taking the cut line as a base. In case it doesn’t break. Place the piece on the edge of the table. Make sure the scrap piece is on edge. In this step, you can use woodworking clamps. To secure the pieces to the table.